Interface Labs - Playing with circuits
This was my first set of labs assigned as part of my ‘Interface Labs’ class
- Lab: Digital Input and Output with an Arduino
- Lab: Analog In with an Arduino
- Lab: Tone Output Using An Arduino
The goal was to get familiar with a breadboard (which I hadn’t used since high school!! See my TDCS project) and the components that go along with it. And of course not to short circuit my board :)
I also filmed a few tiktoks throughout working on these labs to get more comfortable talking about my work in front of a camera.
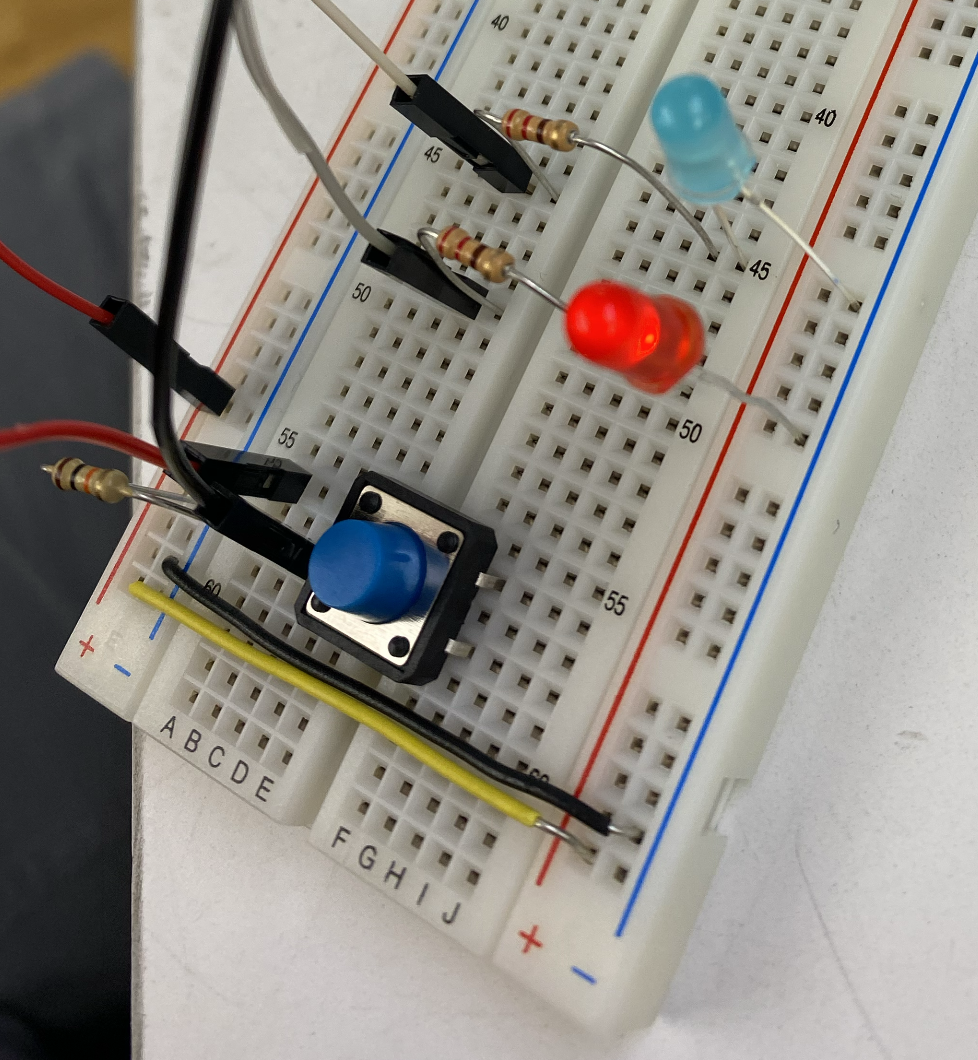
Lab 1: Digital Input and Output
Initial Code
void setup() {
  Serial.begin(9600);
  pinMode(2, INPUT);
  pinMode(3, OUTPUT);
  pinMode(4, OUTPUT);
}

void loop() {
  bool buttonPressed = digitalRead(2);

  digitalWrite(3, buttonPressed ? HIGH : LOW);
  digitalWrite(4, !buttonPressed ? HIGH : LOW);
}
Cleaned up code with button memory
I wanted this button to behave more like a toggle switch than a ‘press and hold’ thing, so I added some state memory to the program!
const int BLUE_LED = 3;
const int RED_LED = 4;

void setup() {
  Serial.begin(9600);
  pinMode(2, INPUT);
  pinMode(BLUE_LED, OUTPUT);
  pinMode(RED_LED, OUTPUT);
}

bool buttonUpdated = false;
bool buttonState = false;

void loop() {
  bool buttonCurrentlyPressed = digitalRead(2);

  if (buttonCurrentlyPressed && !buttonUpdated) {
    buttonState = !buttonState;
    buttonUpdated = true;
  } else if (!buttonCurrentlyPressed && buttonUpdated) {
    buttonUpdated = false;
  }

  digitalWrite(BLUE_LED, buttonState ? HIGH : LOW);
  digitalWrite(RED_LED, !buttonState ? HIGH : LOW);
}
I was genuinely losing my mind because my code was not working. However I realized it’s because I was not defining buttonUpdated and buttonState outside of the loop() function.
@villarreallevi Ima low res interface lab 1
♬ original sound - Levi V
Lab 2: Analog In with an Arduino
Code for potentiometer input. This was simple and not too different from what we did in class
const int BLUE_LED = 2;

void setup() {
  Serial.begin(9600);
  pinMode(A0, INPUT);
  pinMode(BLUE_LED, OUTPUT);
}

// 2^10 - 1
const int POTENTIOMETER_MAX = 1023;
// 2^8 - 1
const int LED_MAX = 255;

void loop() {
  float potentiometer = analogRead(A0);
  float brightness = (potentiometer / POTENTIOMETER_MAX) * LED_MAX;

  Serial.println(brightness);
  analogWrite(BLUE_LED, brightness);
}
LEDs controlled by a potentiometer
@villarreallevi Replying to @queenie
♬ Club Penguin Pizza Parlor - Cozy Penguin
Code for force input
const int BLUE_LED = 2;
const int RED_LED = 3;

void setup() {
  Serial.begin(9600);
  pinMode(A6, INPUT);
  pinMode(A7, INPUT);
  pinMode(BLUE_LED, OUTPUT);
  pinMode(RED_LED, OUTPUT);
}

// 2^9 -1
const int FORCE_SENSOR_MAX = 511
// 2^8 - 1
const int LED_MAX = 255;

void loop() {
  float sensor1Value = analogRead(A6);
  float sensor2Value = analogRead(A7);

  Serial.println(sensor2Value);

  int brightness1 = map(sensor1Value, 0, FORCE_SENSOR_MAX, 0, LED_MAX);
  analogWrite(RED_LED, brightness1);

  int brightness2 = map(sensor2Value, 0, FORCE_SENSOR_MAX, 0, LED_MAX);
  analogWrite(BLUE_LED, brightness2);
}
I had to do some experimenting to get the max force input. So far it seems like every input max is 2^n-1 so when I got force readings in the high 400s/low 500s I knew 511 was probably the max.
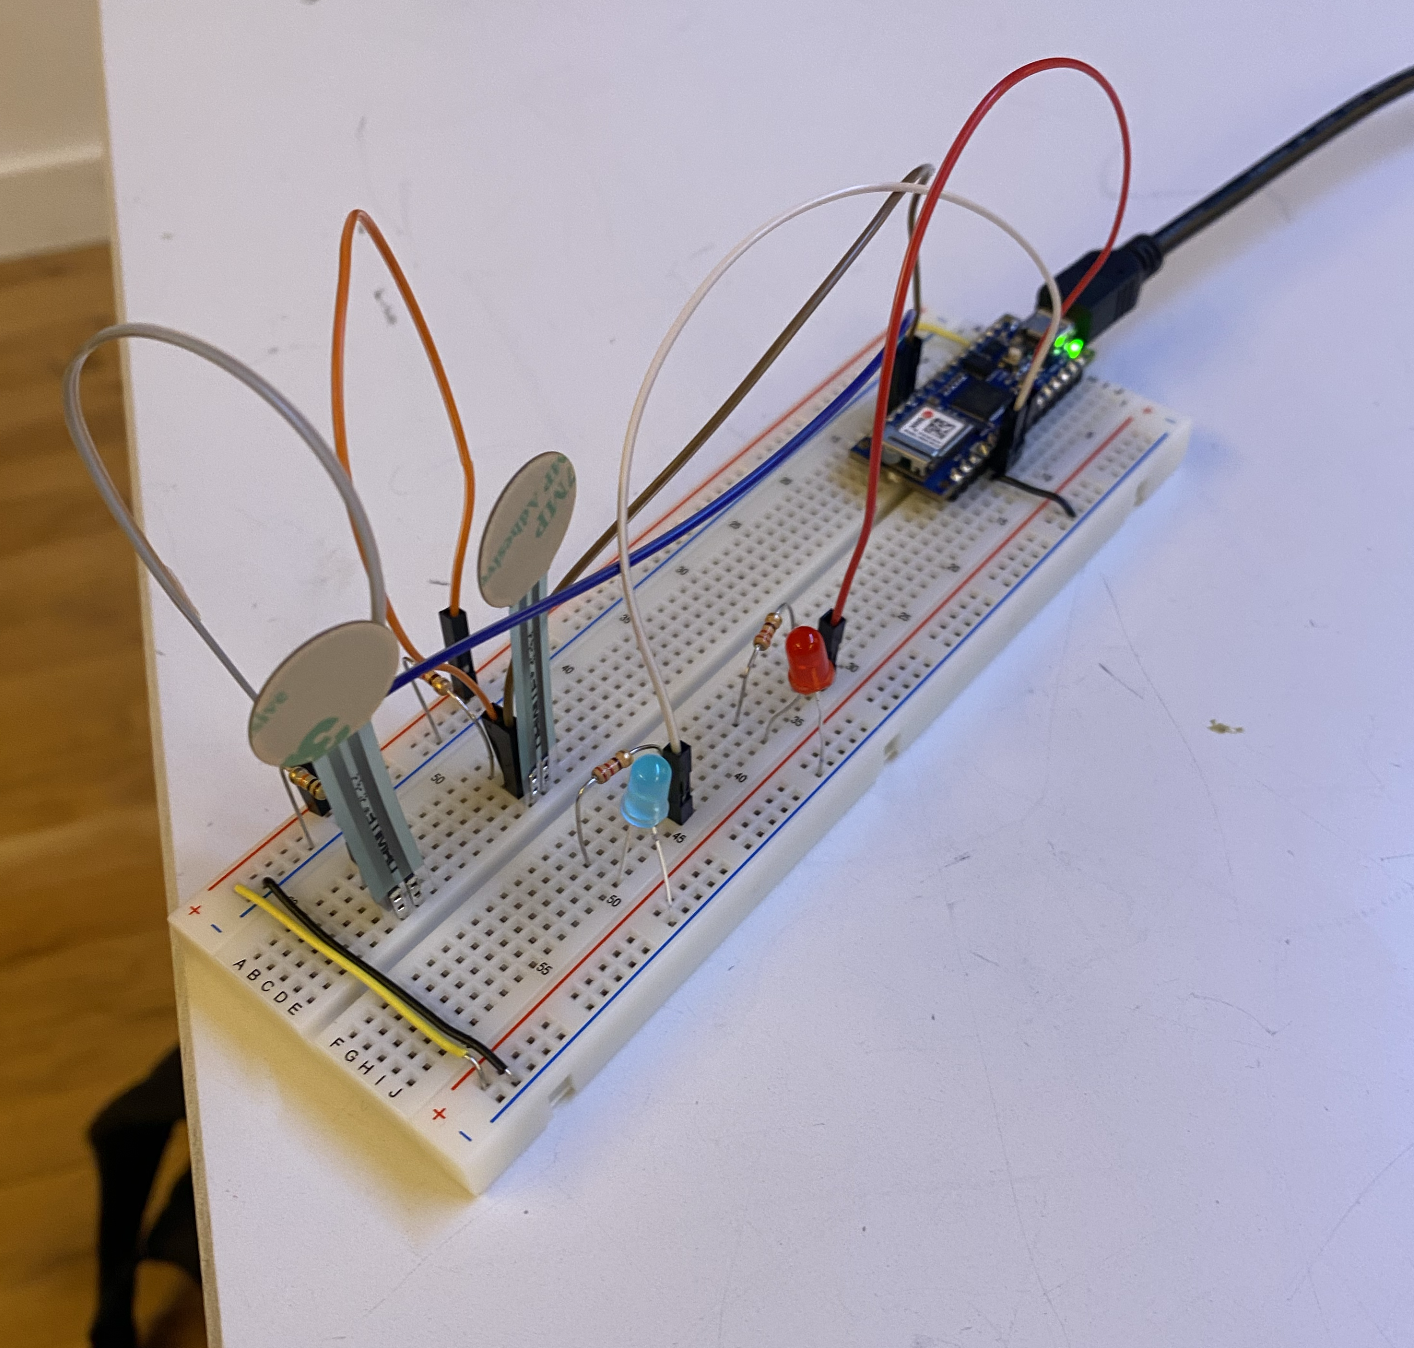
Force input mapped to LEDs
@villarreallevi Replying to @yea.h
♬ som original - Trilha Retrô - Trilha Retrô
Code for speaker output
const int SPEAKER = 2;

void setup() {
  Serial.begin(9600);
  pinMode(A7, INPUT);
  pinMode(SPEAKER, OUTPUT);
}

// 2^8 - 1
const int LED_MAX = 255;

void loop() {
  float sensorValue = analogRead(A7);
  int pitch = map(sensorValue, 0, FORCE_SENSOR_MAX, 100, 10000);
  tone(SPEAKER, pitch);
  Serial.println(pitch);
}
I got the speaker output working without soldering!! I wasn’t sure how to adjust the volume because this played pretty softly. I’m not sure I 100% understood the tone function but I’m getting tired and want to go home :sleeping:.
@villarreallevi Replying to @adri
♬ original sound - Levi V
Lab 3: Tone Output using an Arduino
Oh yay my questions were answered by this lab! analogWrite() changes the loudness, but tone() only changes the frequency. To make the speaker louder, you have to modify the speaker circuit by adding a transistor. However, when I added a transistor, it made it softer. It was my first time using one so maybe I grabbed the wrong one. I also could not find a headphone jack in the bin of electronics in the lab, and don’t have wired headphones, so I didn’t try that part of the lab.
I played around a bit with the music demo they had and called it a night.
const int SPEAKER = 2;
const int NOTE_B0 = 31;
const int NOTE_C1 = 33;
const int NOTE_CS1 = 35;
const int NOTE_C4 = 36;
const int NOTE_D1 = 37;
const int NOTE_DS1 = 39;
const int NOTE_E1 = 41;
const int NOTE_F1 = 44;
const int NOTE_FS1 = 46;
const int NOTE_G1 = 49;
const int NOTE_G3 = 51;
const int NOTE_GS1 = 52;
const int NOTE_GS3 = 54;
const int NOTE_A1 = 55;
const int NOTE_AS1 = 58;
const int NOTE_B1 = 62;
const int NOTE_B3 = 64;
const int NOTE_C2 = 65;
const int NOTE_CS2 = 69;
const int NOTE_D2 = 73;

void setup() {
  Serial.begin(9600);
  pinMode(A7, INPUT);
  pinMode(SPEAKER, OUTPUT);

  // notes in the melody:
  int melody[] = {
    NOTE_C4, NOTE_G3,NOTE_G3, NOTE_GS3, NOTE_G3,0, NOTE_B3, NOTE_C4
  };

  // note durations: 4 = quarter note, 8 = eighth note, etc.:
  int noteDurations[] = {4,8,8,4,4,4,4,4 };

  // iterate over the notes of the melody:
  for (int thisNote = 0; thisNote < 8; thisNote++) {
    // to calculate the note duration, take one second
    // divided by the note type.
    // e.g. quarter note = 1000 / 4, eighth note = 1000/8, etc.
    int noteDuration = 1000/noteDurations[thisNote];
    tone(SPEAKER, melody[thisNote],noteDuration);

    //pause for the note's duration plus 30 ms:
    delay(noteDuration +30);
  }
}

void loop() {
}
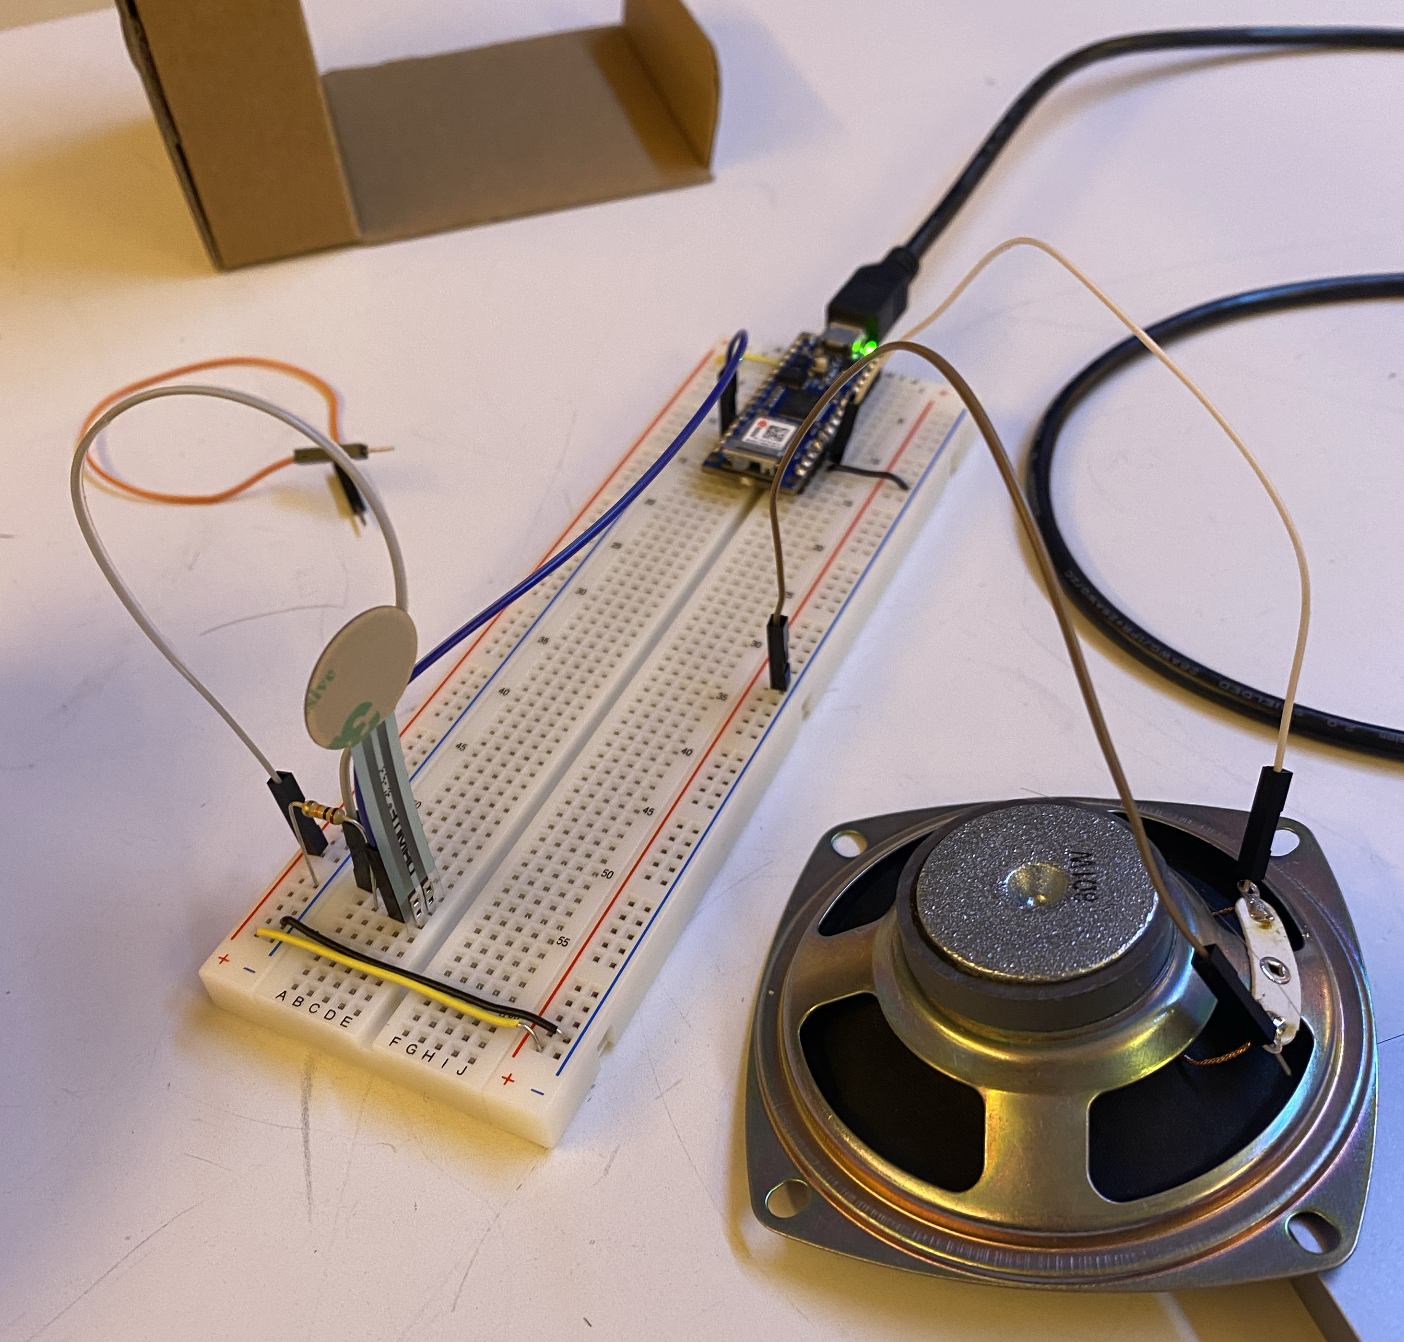
Speaker on the breadboard
Reflection
This was a fun assignment! It got me more comfortable with wiring, making mistakes, and understanding the components that came with my arduino starting kit. Some sensors I think it could be cool to play with in the future are
- Fingerprint sensor
- GPS Sensor
- Although what would be the point of buying this when I could use a bluebooth/wifi module with a cellphone/
- Motion sensor
- An Xbox Kinect camera!
I’ve started thinking [a lot!] about what I should do for my first interface project, but honestly I’m still at a loss!!