Desk Friend
Desk Friend (2025) Levi Villarreal
Throwing things into the digital ether
When someone tells me that they read my blog, or saw a project I put online - I am always shocked. Despite the fact that putting things online is sharing your work in the most wide reaching way possible in human history - it still feels somehow detached from reality. Like the web is a sphere that sits next to the physical world, only occasionally making contact.
I think this is why I have always loved digital guest books. Things that allow people to write “I was here”. It’s like getting to the end of a solo hike to a lonely peak, and seeing a log box that shows you are connected to the travelers that had made the journey before long before you.

Three of my inspirations for this project.
1) A summit log on the top of a mountain in Mexico, where my friends from New York had written a year earlier.
2) yourworldoftext by Selene Chang - a text based log book and collaborative website.
3) Gleb Sabirzyanov’s logbook - a long running open access Figma file that allowed any type of contributions before eventually shutting down in 2024.
I wanted this project to be an extension of this idea - a way for digital travelers who stumbled across my website to make their presence known to me in the phyiscal world.
Minimum viable product
I became a bit paralyzed when considering a long term installation that could live on my desk (or perhaps a wearable?). Thus I decided to focus on a minimum viable product or MVP. I wanted to make something movie via an Arduino using a button on my website. Shouldn’t be too hard right?
3D Model
I scanned my real life friend - Queenie, for the physical object that would move. I used a free Polycam account to take a series of 120 pictures on the floor of the NYU ITP lab in Brooklyn. I cropped the scan in the app, and used the free web based 3d editor OnShape to convert the file from gltf to stl - a format required by the 3D printers in the school.
The 3d model after scanning and cropping
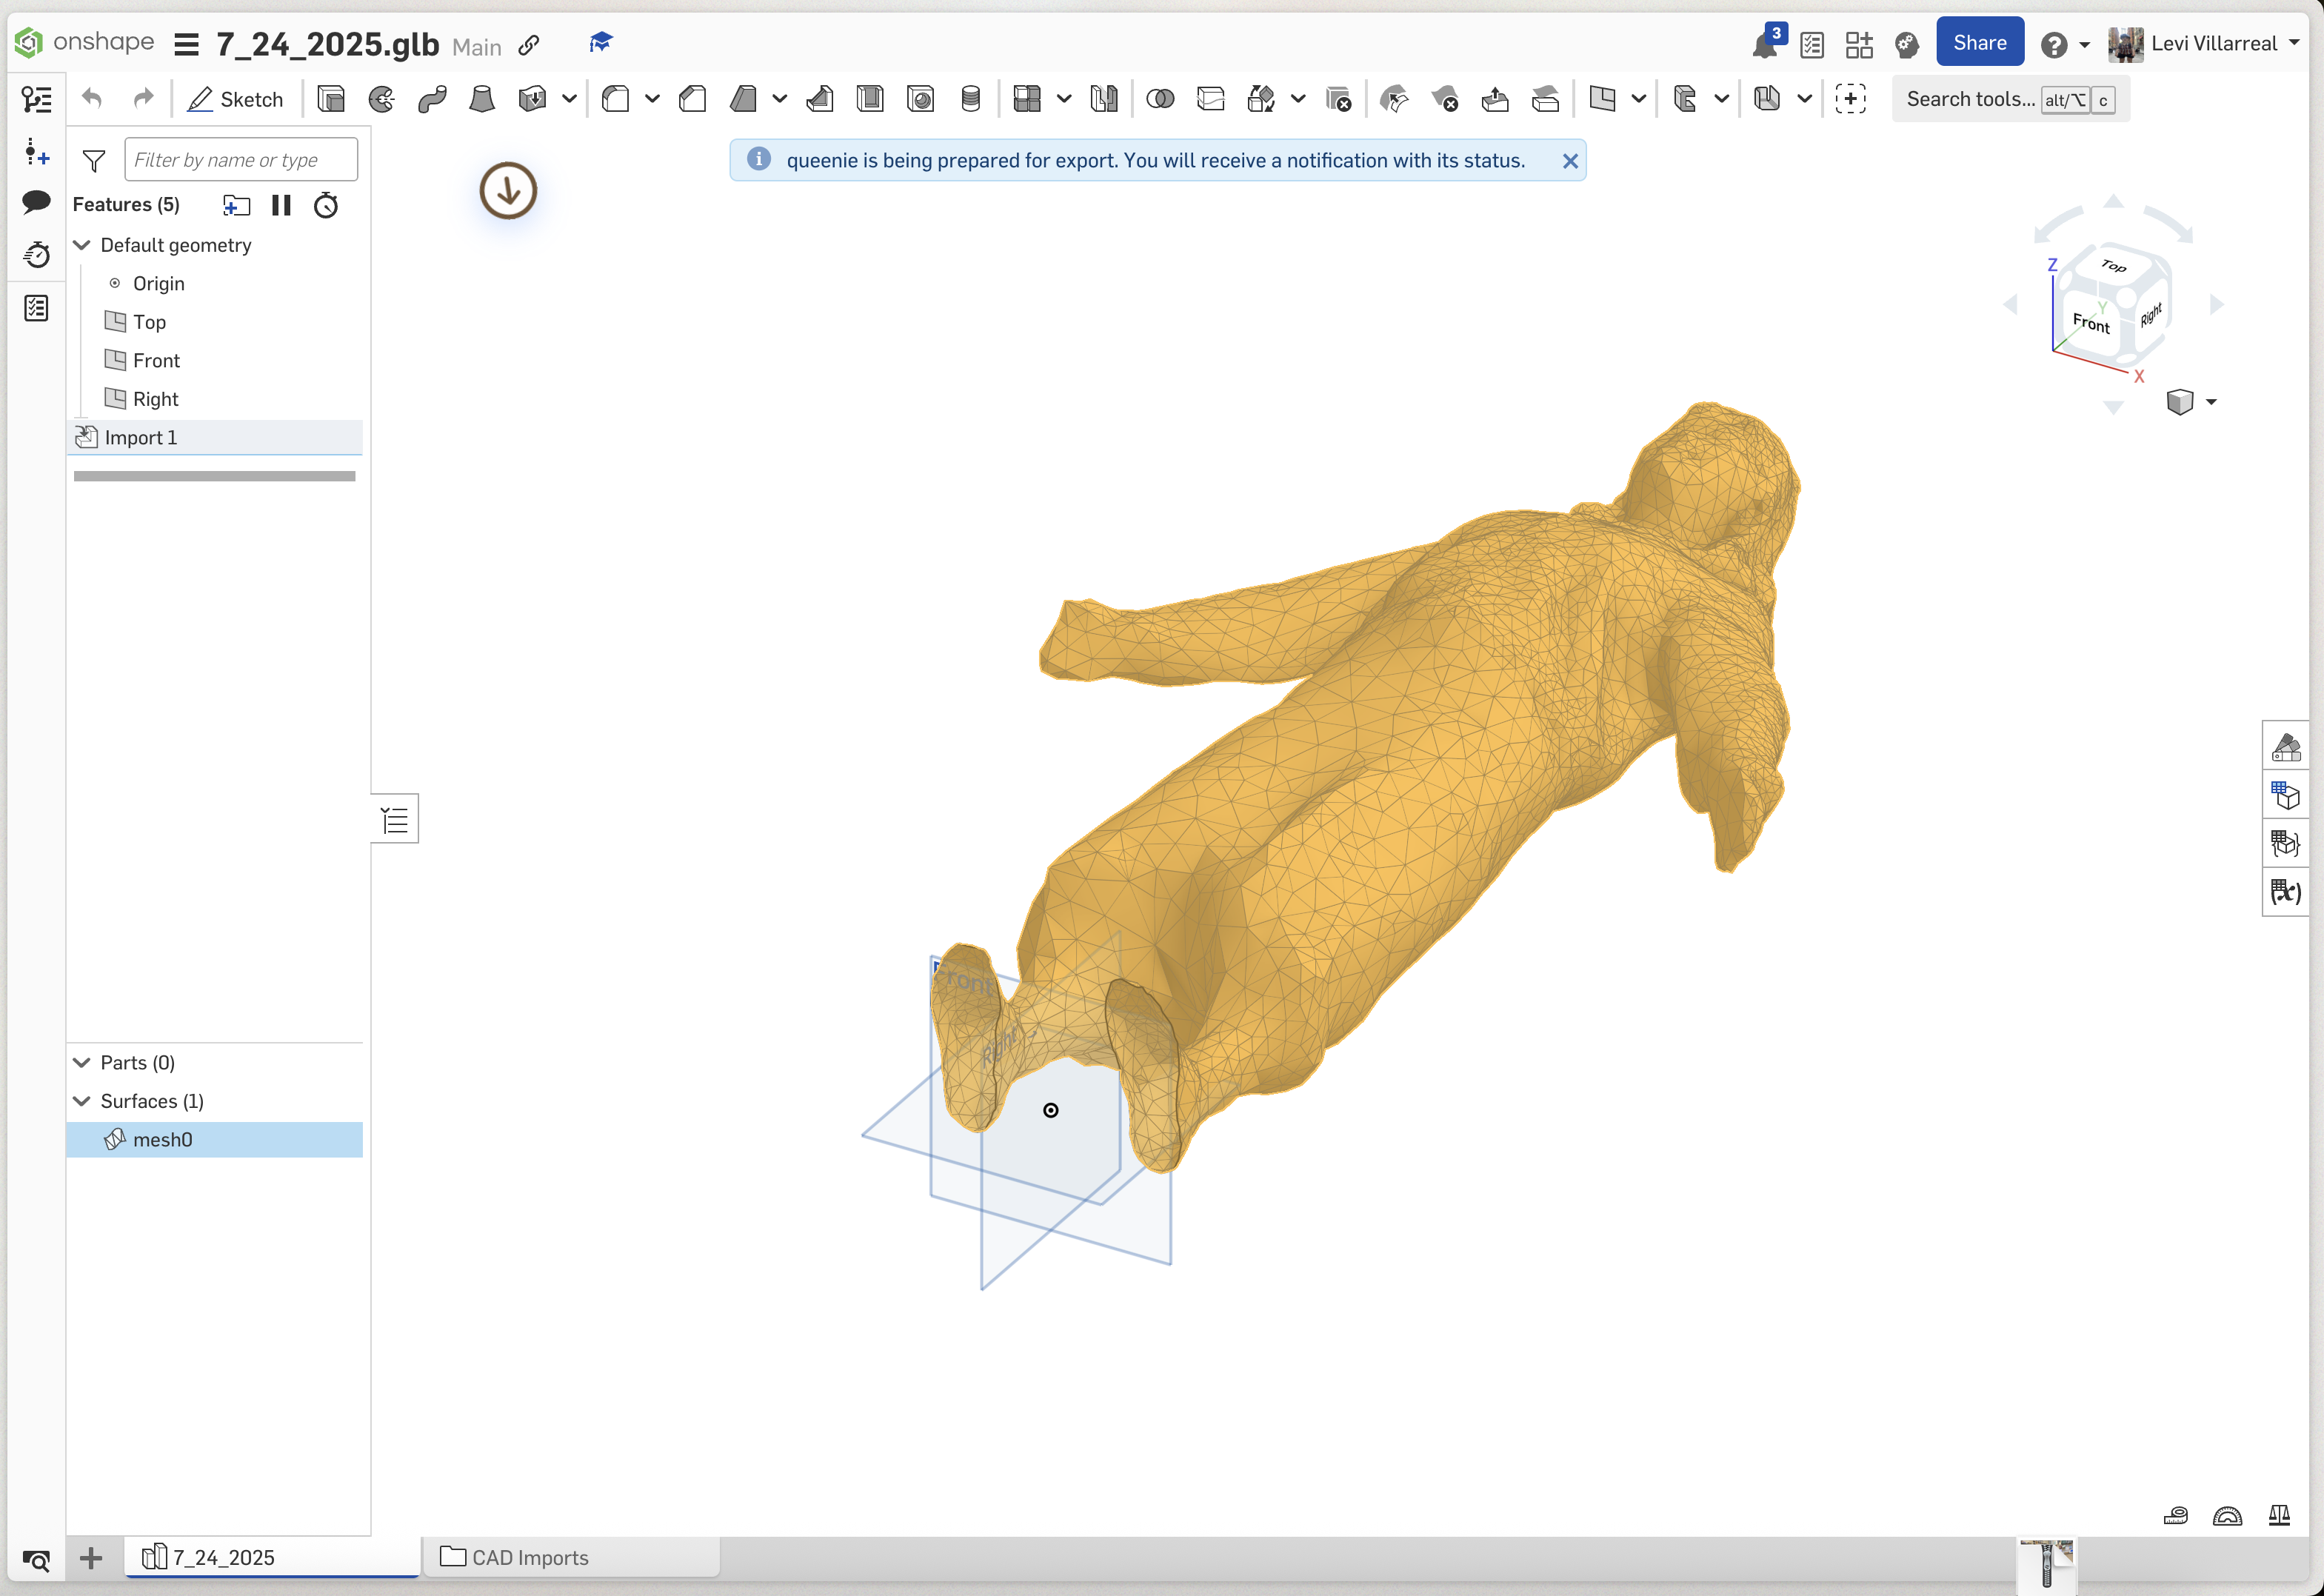
Preparing the model for export
Model print timelapse
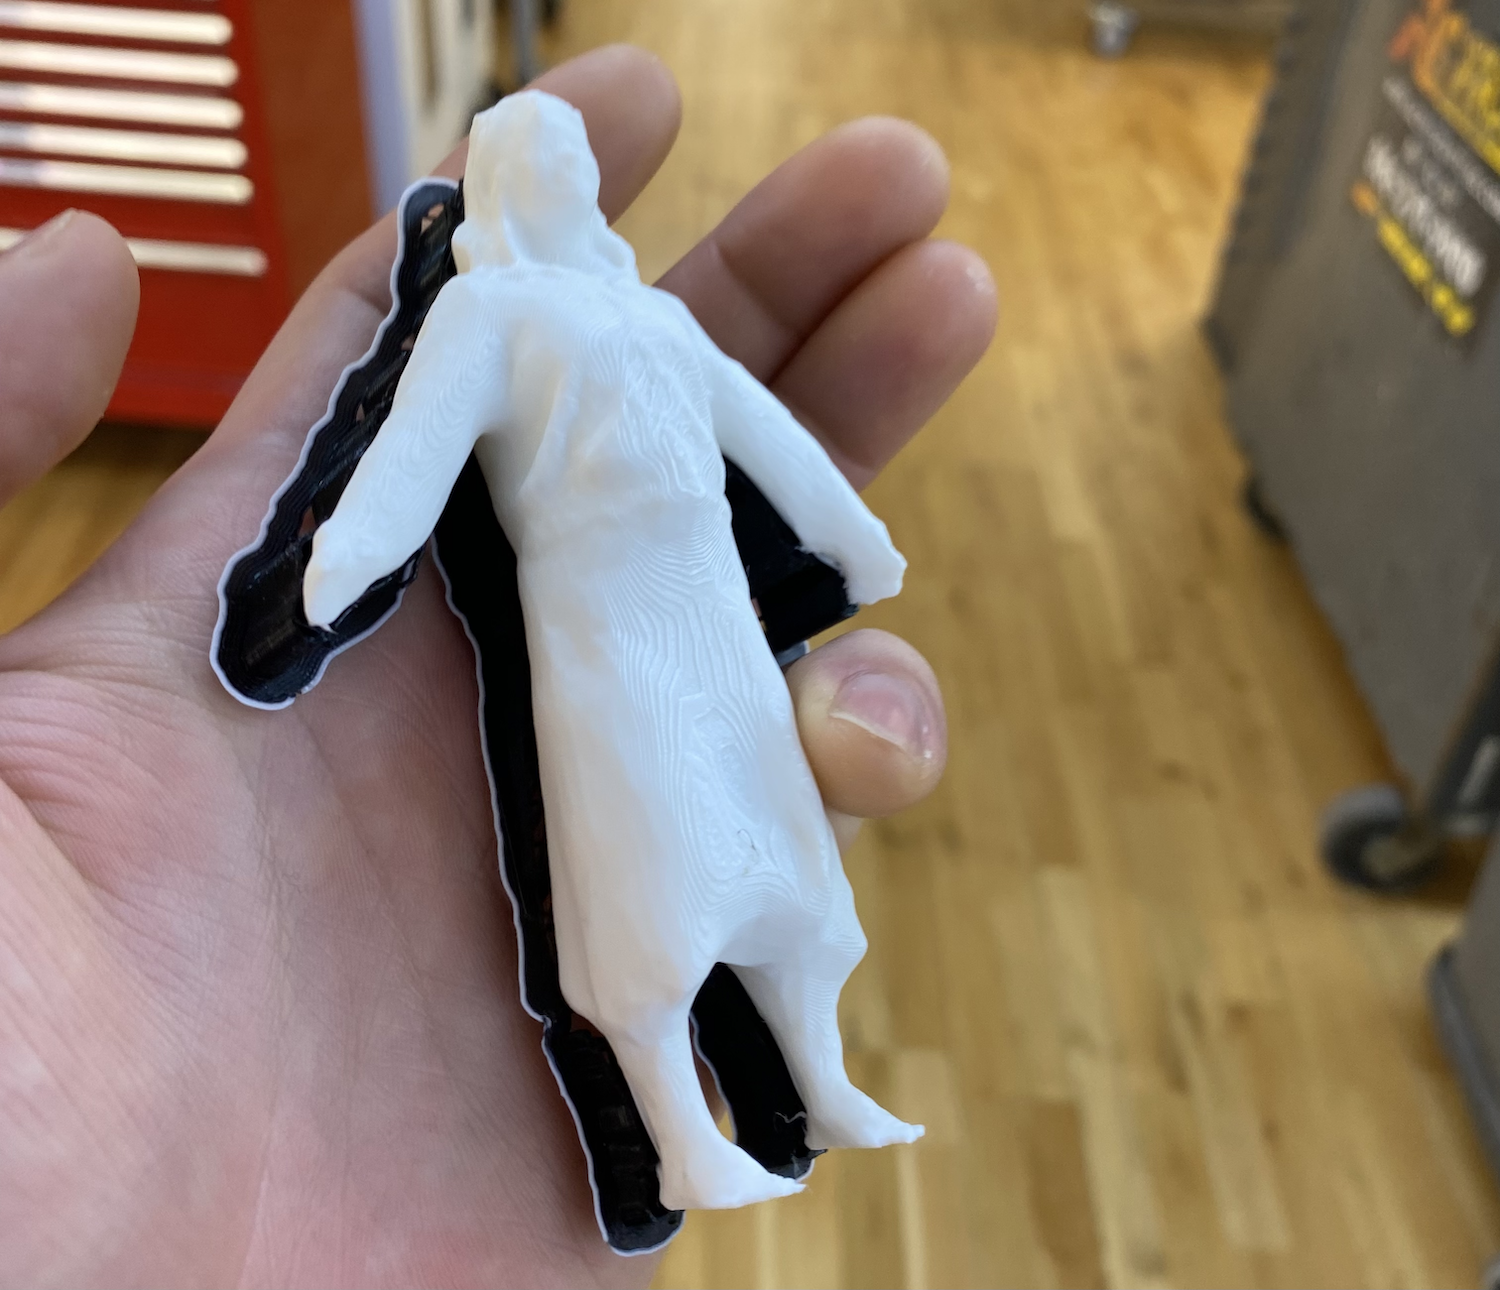
Completed print with support structures
Circuit
The circuit was the easiest component of this project. All I used was
- Abreadboard
- Arduino 33 IOT Nano
- Servo
- Some wires
I connected positive to positive, negative to negative, and most importantly, the servo to analog output.
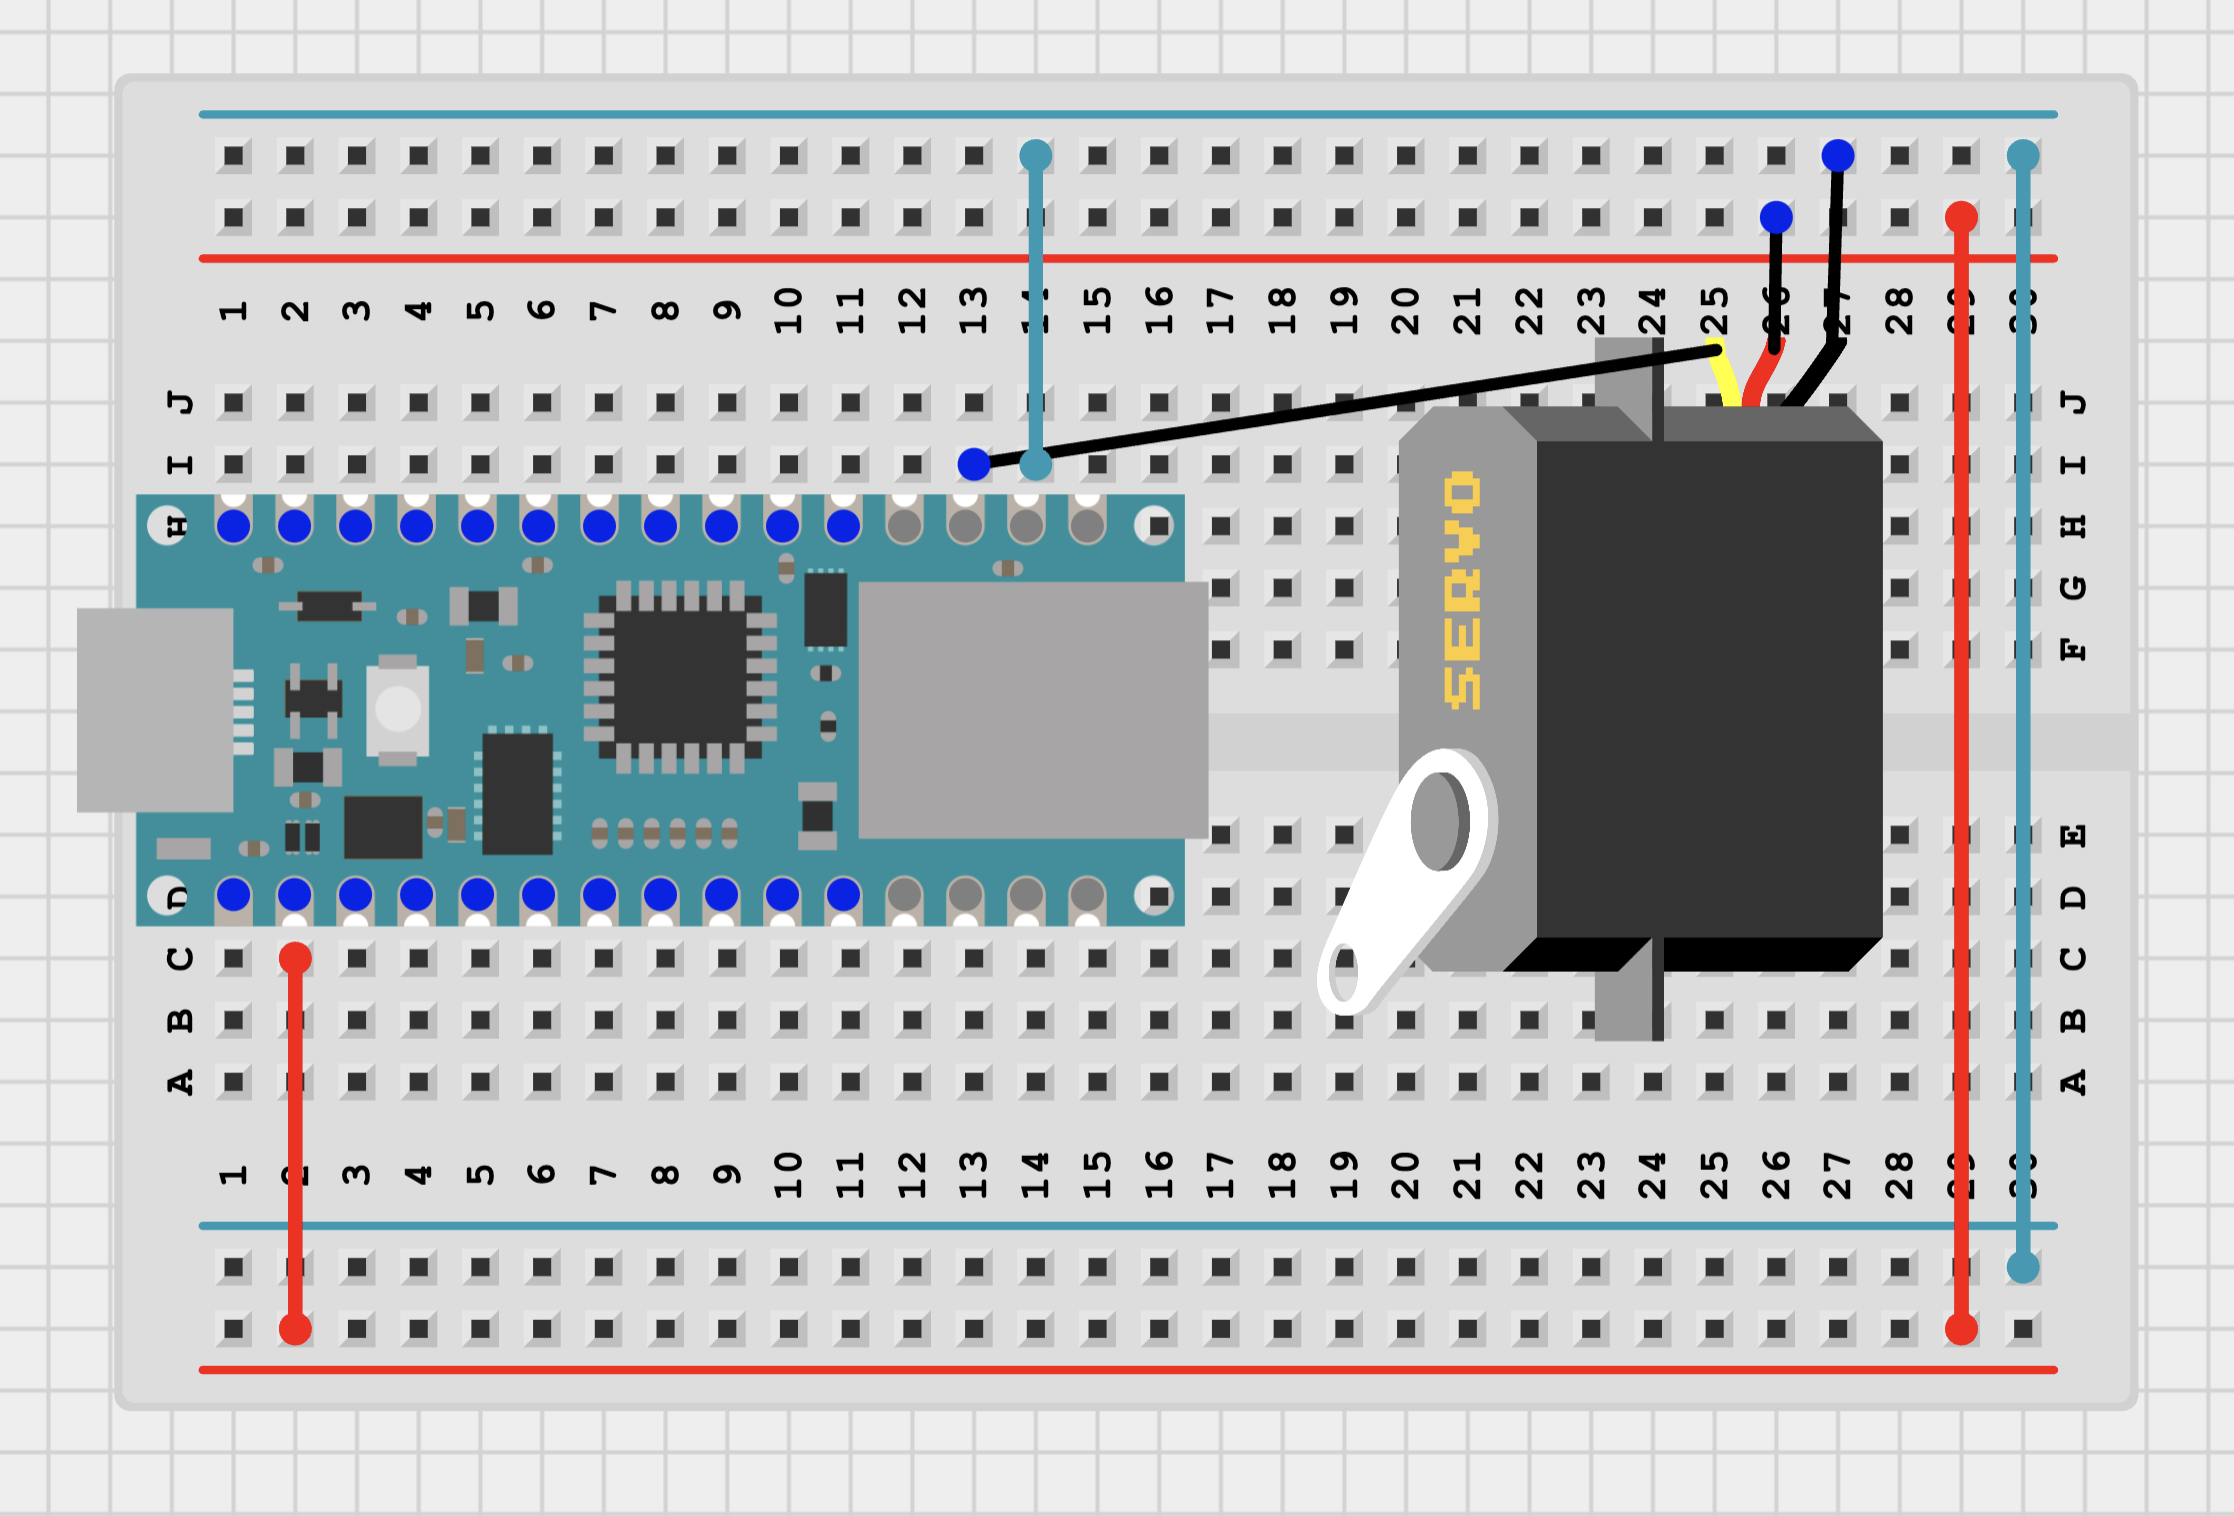
Circuit diagram - only one component!
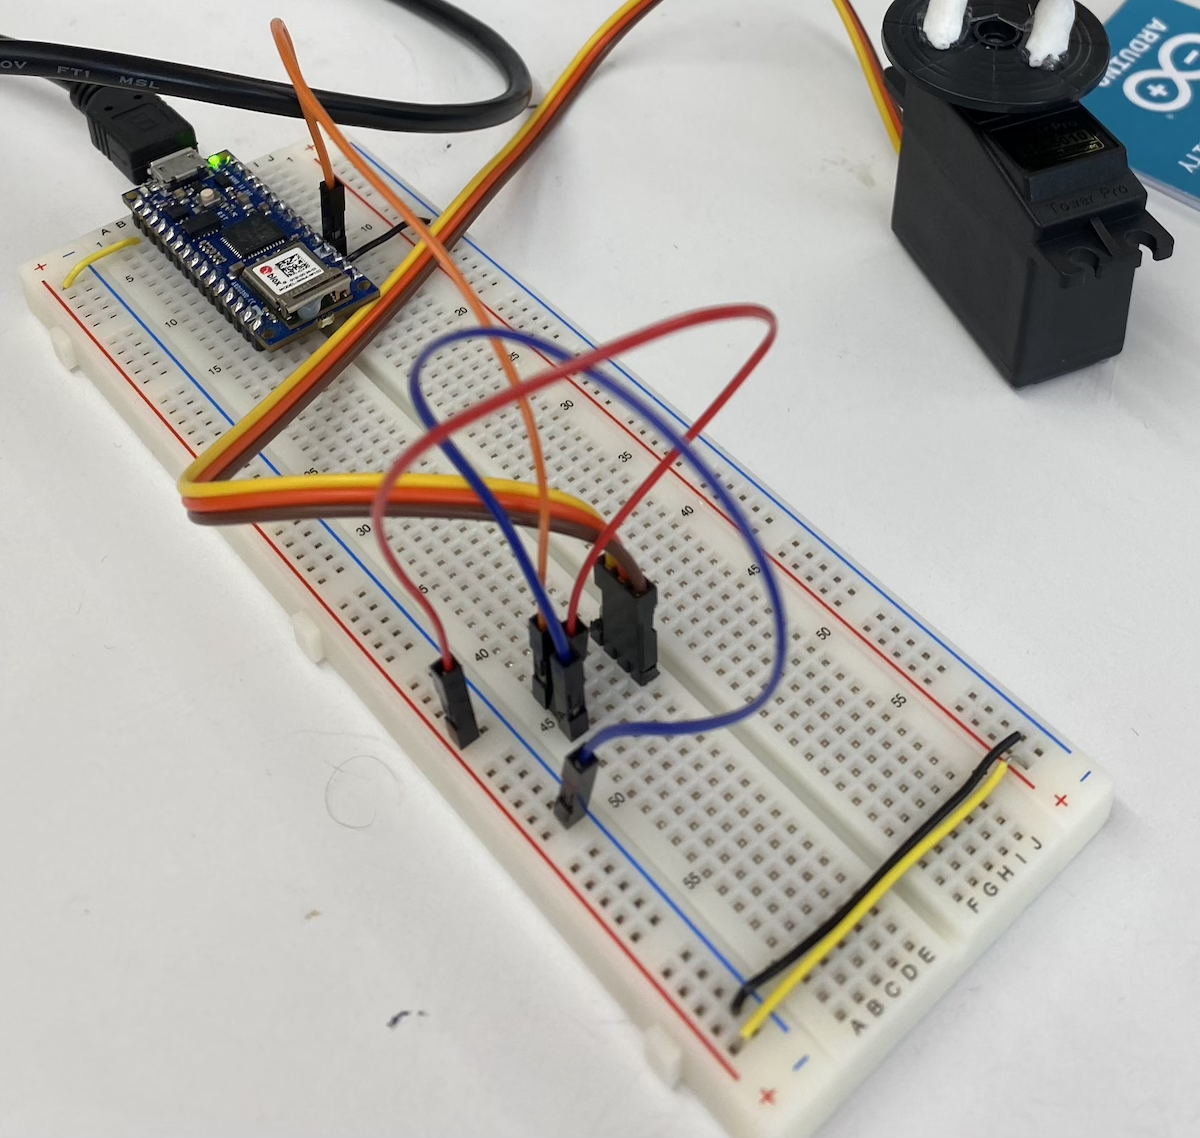
Wired up breadboard
Once I had this wired up I wrote a simple program to turn the servo to confirm it did indeed work.
Code
I went to one of the program residents to ask for ideas on how to control the servo from a website. Later that night they sent me a message that gave me a bit of dismay.
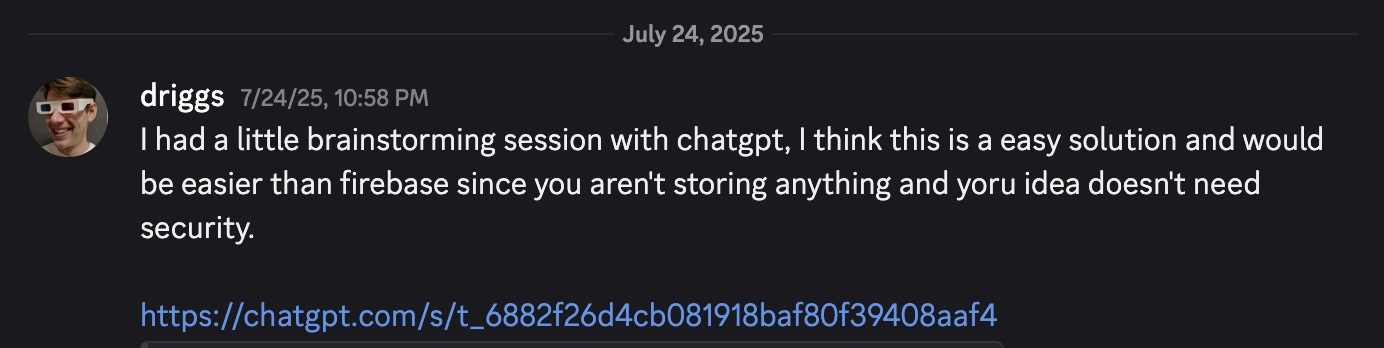
Screenshot of the discord message
I had gone to them because I wanted more personal and experienced aide than a chatbot would give me, But perhaps that was just my robophobic bias showing so I decided to give Mr. ChatGPT a fair shake. It recommended using GitHub Gists to store the data I needed. These are usually small snippets of code that don’t require setting up a whole repository. In this case just a single .json file with a single boolean. I whipped up an html file with a simple start and stop button that could flip the boolean from true to false in the Gist.
Of course the code from ChatGPT didn’t work first try, but I eventually got the arduino to read and parse the json from the GitHub Gist API. However, it was… extremely slow. Despite the page on the GitHub website updating very quickly - it often took the api a full minute or more to update. GitHub never intended these snippets to be used as a weird backend server, so their api response was heavily cached. I tried to coax ChatGPT to get me around these issues, but a few horus later and lots of broken AI-generated code later, I was extremely frustrated.
At this point I had less than an hour left to finish the project - and nothing was working. I switched to Firebase in an act of desperation. I actually interned on the Firebase Performance Monitoring team in 2019 so it was something I had used before. I tried again to ask ChatGPT for help and it was again as useless as before - so I eventually implemented my own simple http request program. This worked first try. With less than 10 minutes before class starting, I committed my code and pushed the website live - temporarily disabling any API authentication.
The relevant code is as follows:
sketch.ino
#include <Servo.h>
#include <WiFiNINA.h>
#include <WiFiSSLClient.h>
#include <ArduinoHttpClient.h>

const char* ssid = "wifi_name";
const char* password = "wifi_password";
const char* host = "firebase_id_here";

WiFiSSLClient sslClient;
HttpClient httpClient = HttpClient(sslClient, host, 443);

void setup() {
  Serial.begin(9600);
  servoMotor.attach(servoPin);
  WiFi.begin(ssid, password);

  // Retry the wifi connection every 2 seconds
  while (WiFi.status() != WL_CONNECTED) {
    delay(2000);
    WiFi.begin(ssid, password);
    Serial.print(".");
  }
  Serial.println("\nWiFi connected");
  httpClient.get("/motor.json"); // Motor is the name of the variable in firebase
}

void loop() {
  unsigned long now = millis();

  if (now - lastCheckTime > 5000) {
    lastCheckTime = now;
    checkData();
  }

  if (motor) {
    // Move the servo between 0 and 180
    ...
  }
}

void checkData() {
  httpClient.get("/motor.json");
  int status = httpClient.responseStatusCode();
  if (status > 0) {
    String response = httpClient.responseBody();
    Serial.println(response);
    motor = response == "true";
  }
}
buttons.html
<!-- HTML with buttons and text etc -->
<script>
    // Firebase config with only databaseURL (no apiKey/auth needed)
    const firebaseConfig = {
      databaseURL: "https://motor-88c72-default-rtdb.firebaseio.com"
    };

    // Initialize Firebase
    firebase.initializeApp(firebaseConfig);
    const database = firebase.database();

    // Write motor state to /motor node
    function setMotor(state) {
      database.ref('/motor').set(state)
        .then(() => {
          alert(`Motor turned ${state ? "ON" : "OFF"}`);
        })
        .catch(error => {
          console.error("Failed to update motor state:", error);
          alert("Failed to update motor state.");
        });
    }
  </script>
This code was kind of gross and not something I was proud of. I have no real error handline, no styling, no async call in the Arduino code. It barely worked for a proof of concept, and would need several refinements before it would be something I would consider passable.
Reflection
I was able to give a successful live demo in class! I had classmates turn the device on and off from their own computers, and it was such a relief that everything managed to come together at the last moment.
Despite that, it’s hard to feel I didn’t completely miss the mark on this project. So far I have consistently been able to turn out high quality work in this program, and this was definitely not an example of that. My desire to use AI tools almost spelled disaster for this project. However, I am proud of myself for getting something working in spite of everything that went wrong. I’m glad I got to learn how to do a quick 3d scan, and that my project was something that could speak to my peers.